Your pool is losing water. The water level drops too fast. The auto-fill runs all day. You may have a leak. Before you pay for any pool leak repair, you need to find and fix the right thing. Step one is leak detection. The right diagnosis steers you to the right repair. A leaky pool can come from many sources. A torn vinyl liner. A cracked pool shell. A bad fitting on the pool plumbing. A skimmer that has pulled away. A pressure test on the underground plumbing. Pool leak detection covers every part. Every source. Pool owners who run a proper leak detection process save money. They avoid wrong repairs. They keep their pool open. Leak detection in swimming pool care is a step-by-step science. This guide walks pool owners through how to diagnose a leak before any pool repair. We cover the bucket test, the dye test, the pressure test, and how to fix pool leaks at the source. Torque Lock handles concrete shell cracks. The rest of the work goes to the right pool specialist.
Why Diagnose a Pool Leak Before Repair?
Many pool owners skip the leak detection step. They call a contractor. They get a repair estimate. They pay for a fix that does not stop the leak. Then they pay again.
A proper leak detection process saves you money and saves you water. A pool can lose hundreds of gallons of water per day to a hidden leak. Over a month, that is thousands of gallons. Over a year, that is more than a full pool. If the repair costs are high, your water costs are higher.
The first rule of pool leak repair is simple. Know where the leak is before you touch the pool.
Is It Evaporation or a Real Pool Leak? The Bucket Test
Some pool owners think they have a leak when the real cause is evaporation. A pool in a hot, dry zone can lose a quarter to a half inch per day to the sun. Wind also drives loss. Before you assume a leak, run the bucket test.
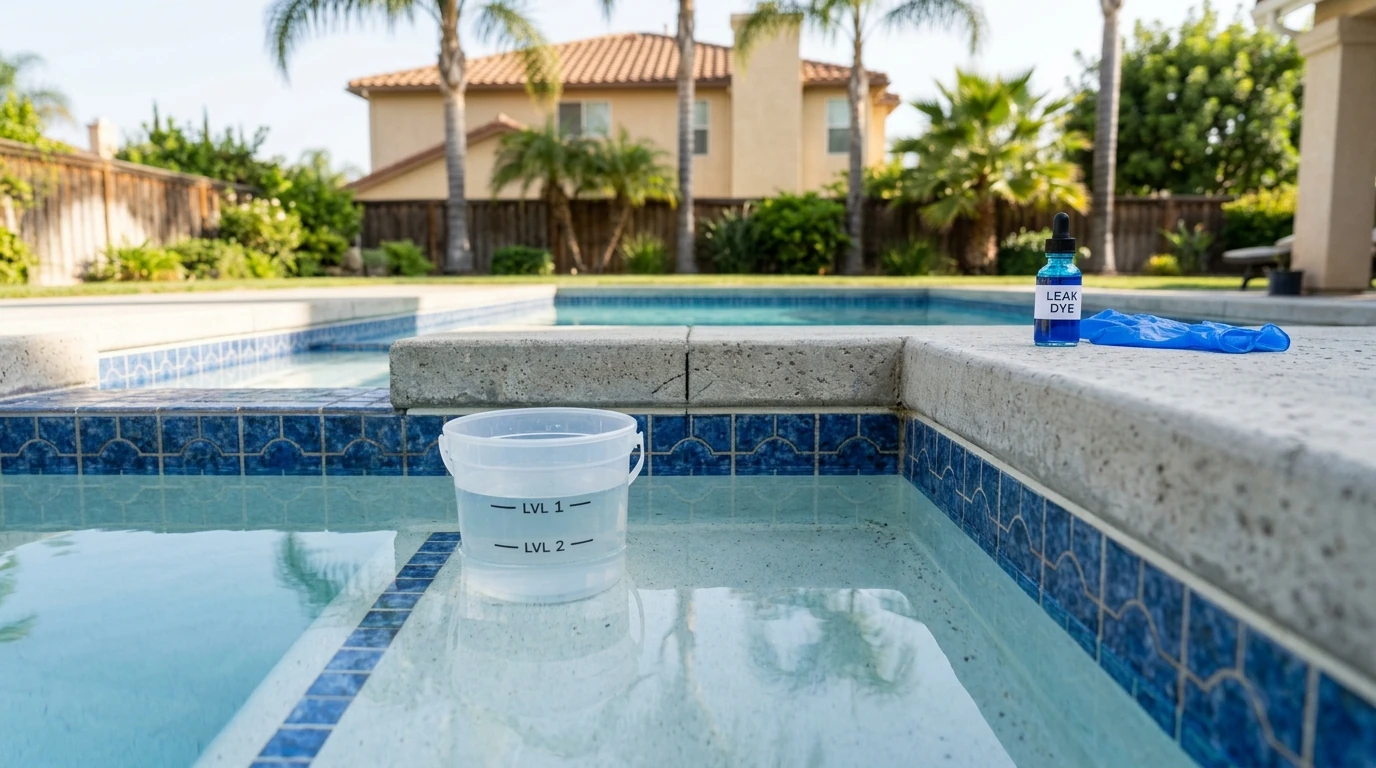
The bucket test is simple. You need a five-gallon bucket and the pool. Here is the test:
- Fill the bucket about three-quarters full with pool water
- Set the bucket on the pool step or deck near the edge of the pool
- Mark the water level inside the bucket with a pencil or tape
- Mark the water level on the outside of the bucket where it meets the pool water
- Wait 24 to 48 hours with no swimmers and no rain
- Check both marks
The bucket sits in the same air as the pool. Evaporation hits both at the same rate. If the water level inside the bucket drops at the same rate as the water level on the outside, your loss is just evaporation. If the pool drops faster, you have a leak.
If the water loss is actually a leak, move to the next step.
Signs Your Pool Is Leaking
A real pool leak shows up in many ways. Here are the most common signs of a leak:
- The pool water level dropping more than a quarter inch per day after the bucket test
- The auto-fill runs all day or kicks on too often
- The ground near the pool feels soggy or stays wet
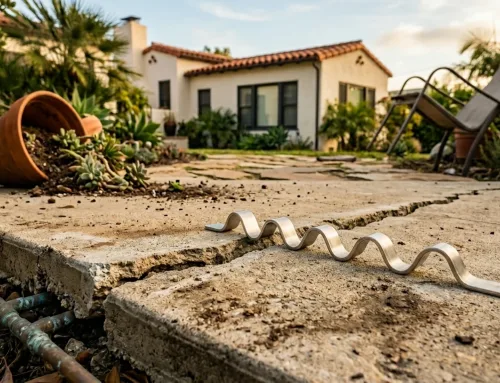
- The pool deck has shifted, cracked, or sunk in spots
- The pool light niche has rust stains around it
- Air bubbles come out of the return lines when the pump runs
- The skimmer pulls air or runs dry
- Tile lines around the pool show mineral stains
Any one of these signs could indicate a leak. Two or more is a strong sign of a leak. Pool owners who see these signs should suspect a leak right away. When a pool loses water faster than expected, the cause is rarely just the sun.
A few other clues. If your chlorine demand jumps, the pool may be losing water faster than you think. If your heater runs longer to hit set temperature, the cold makeup water is a clue too.
Step 1: Mark the Water Level and Measure the Loss
Once you suspect a leak, mark the water level. Use a pencil, a piece of tape, or a grease pen on the tile or skimmer face. Note the date and time. Wait 24 hours. Check the new water level.
A pool that drops more than a quarter inch in 24 hours after the bucket test confirms a leak. A drop of half an inch or more is a big leak. A drop of an inch or more in a single day is a major leak.
Now you know your pool is leaking. The next steps narrow the location of the leak.
Step 2: The Dye Test for a Suspected Leak
The dye test is the cheapest tool in any leak detection process. You can buy a leak detection dye test kit from any pool supply store. A small bottle of red, blue, or green dye is enough for several tests.
Here is how to run a dye test on a pool:
- Turn off the pump so the water is still
- Wait 10 to 15 minutes for full stillness inside the pool
- Put on a mask and snorkel
- Squeeze a small amount of dye near the edge of any suspected leak spot
- Watch the dye for 30 to 60 seconds
- If the dye streams into a crack or fitting, you have found a leak
Common dye test targets:
- The mouth of the skimmer where it meets the pool wall
- Around each return line fitting
- The light niche and conduit at the back
- Cracks in the pool shell or pool plaster
- The deep-end main drain
- Any visible crack on the pool wall or floor
The dye test points you to the location of a leak you can see. Underwater pool leaks at the skimmer, return lines, or visible cracks are easy to spot. Hidden leaks need more work.
Step 3: Check the Pool Equipment First
Before you blame the pool itself, check the pool equipment. Many leaks live around the pump, filter, and heater pad. A bad pump seal can drop a pool by an inch per day. So can a cracked filter housing. So can a leaking heater inlet.
Walk the equipment pad with the pump running. Look for wet ground under each piece of gear. Touch fittings and unions. Wipe them with a paper towel. A wet towel after a dry day means a leak.
If the leak is at the equipment, you can often fix it with a new gasket or a small repair. If the leak is in the pool plumbing under the equipment, you need a pressure test.
Step 4: Listen for the Auto-Fill and Pump
Your auto-fill valve is a free leak detector. Note how often it kicks on. Time how long it runs each day. A pool that fills for more than 15 minutes a day on a calm cool week has a real leak.
The pump can also tell you a lot. A pump that catches air on startup points to a suction-side leak. The leak is between the pool and the pump. A pump that holds prime but loses water from the pool points to a pressure-side leak. The leak is between the pump and the return lines.
Both clues help you map the pool plumbing leak before any repair.
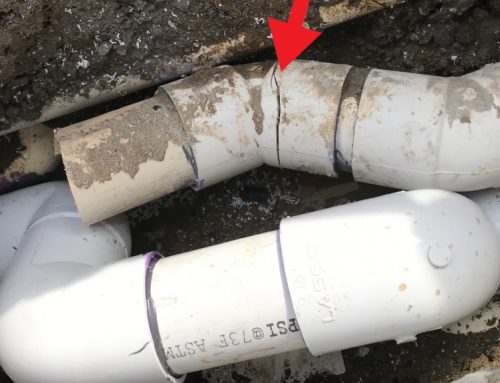
Step 5: Pressure Test the Pool Plumbing
A pressure test on the pool plumbing is the gold standard for underground plumbing leaks. A pool tech caps each line at the equipment pad and at the wall. They pump air into the line. If pressure drops, that line leaks. The next step is to listen for the air with a stethoscope or to flood the line with dye.
A pressure test finds:
- Underground plumbing leaks under the deck or yard
- Pipe leaks in return lines and suction plumbing lines
- Leaks in the skimmer plumbing or main drain plumbing
- Underground pipe damage from tree roots or shifting soil
- An underground leak that hides under the slab for months
A pressure test is a pro job. Most pool owners hire a leak detection company at this stage. National brands like American Leak Detection have made the process known to many pool owners. Many local pool service teams offer the same test.
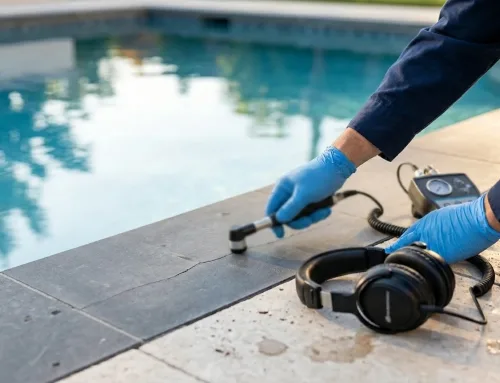
Step 6: Underwater Pool Inspection
If the dye test and pressure test do not find the leak, the next step is a full underwater pool inspection. A leak specialist uses detection tools to pinpoint leaks the eye cannot see. Common tools:
- Hydrophones to listen for water moving through soil
- Helium tracer gas to find tiny cracks
- Pressure gauges on each plumbing line
- Underwater video cameras to scan the pool shell
These detection tools pinpoint the leak location with high accuracy. A good leak detection process ends with a clear map. You know the source of the leak. You know the right repair.
Mapping the Leak Source to the Right Repair
Once you know where the leak is, you can pick the right repair. Each leak source has a best fix. Here is the map.
| Leak Source | Right Repair | Who To Call |
|---|---|---|
| Skimmer pulling away from wall | Reseal joint or use pool putty | DIY or pool tech |
| Return line plumbing leak | Replace fitting or section | Licensed plumber |
| Underground plumbing leak | Excavate and repair line | Licensed plumber |
| Crack in concrete pool shell | Torque Lock staples | Torque Lock pro or DIY |
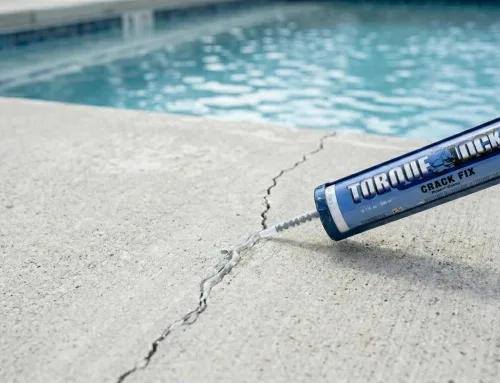
| Hairline crack in pool plaster | Crack Fix Epoxy plus staple | Torque Lock pro |
| Vinyl liner tear | Liner patch kit on the vinyl pool | Pool tech |
| Light niche or conduit leak | Reseal niche or conduit | Pool tech |
| Pump or filter leak | New gasket or part swap | Pool tech |
This map keeps you out of the wrong-repair trap. A pool plumbing leak is not the same as a shell crack. A vinyl liner pool leak is not the same as a concrete pool leak. Each repair path has a different cost and a different crew.
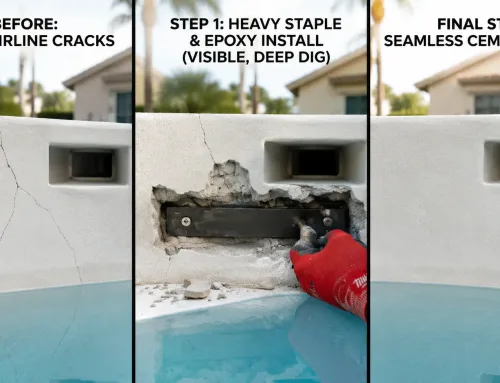
When the Leak Is in the Pool Shell: Torque Lock
If the leak detection process points to a crack in the concrete pool shell, you are in Torque Lock’s lane. A leaking pool with a shell crack does not need a full drain or a full replaster. Torque Lock seals the crack with the water still in the pool in most cases.
Torque Lock makes the only Controlled Post Tension Staple on the market. Each staple locks a concrete crack shut with up to 5,000 lbs of force. The patented Cam Lock design holds the crack closed for the life of the pool.
Torque Lock products for pool shell crack repair:
- TL-10 Staple Kit: Small cracks in the pool shell and pool deck
- TL-30 Staple Kit: Mid-size cracks in the shell wall or floor
- TL-50 Staple Kit: Large structural cracks in heavy concrete shells
- TL-12″ and TL-18″ Staple Kits: Long crack runs across the pool floor or wall
- TLR-45 and TLR-90 Staple Kits: Corner cracks where wall meets floor
- Crack Seal Flexible Membrane: Watertight seal over each staple
- Quick Lock Hydraulic Cement: Fast set patch for active leaks
- Crack Fix Epoxy: Bonds the crack before stapling
A trained pool tech can install a Torque Lock staple in tight spaces with a grinder and a cordless drill. No heavy gear. No drain. The fix lasts.
When to Call a Leak Detection Company
Some leaks hide. You ran the bucket test. You ran the dye test. You checked the equipment. The leak continues. Now is the time to call a leak detection company.
Pros bring tools you do not have. Acoustic sensors. Helium tracers. Underwater video. They can pinpoint leaks in underground plumbing in a few hours. They write a clear report. They mark the leak location on the deck.
A good leak detection report is worth more than the cost of the visit. It tells you what to fix and what not to fix. It cuts wasted repair dollars. It often pays for itself in one visit.
If your pool is leaking and you have run the at-home tests with no luck, call a leak specialist. Bring your bucket test notes. Bring your water level marks. The more data you bring, the faster the leak test runs.
Quick Tips for Pool Owners Before Any Repair
A few last tips for any pool owner who suspects a leak:
- Turn the pump off for 24 hours and watch the water level drop with the pump off, then on
- Mark the pool level twice per day for a full week
- Save photos of every wet spot in the yard and every crack on the deck
- Note when the leak is worst, since some leaks only show with the pump running
- Get a repair estimate only after you know the location of the leak
- Ask each pro to walk you through their leak detection process
Vinyl liner leaks need a quick eye. A pool with a vinyl liner can lose water fast through a tiny tear. Most liner leaks occur at gaskets around the skimmer and returns, but they can also pop up at folds in the floor. Vinyl pools can also leak at the bottom of the pool liner where it meets the wall track. Vinyl liner leaks need a patch from a pool tech, not a structural staple. A concrete pool shell with a crack is the Torque Lock job. Know your pool type before you order parts. Once the patch is set, the leak stops in most cases. Confirm with a second bucket test a few days later.
A new pool that leaks often has a fitting that was not tightened during build. Run the dye test on every fitting first. The leak is likely there.
Why Pool Owners Trust Torque Lock for Shell Crack Repair
Torque Lock Structural Systems is based in Agoura Hills, California. We have made structural crack repair products for years. Our team has worked with pool owners, pool techs, and pool builders across the country.
Our products are used at NASA, Marriott, Siemens, the University of Texas, and many homes with pools in California, Nevada, and beyond. We ship kits with full instructions. We also offer the Torque Lock Structural Repair Training Course. Pool techs can earn the skills to seal a shell crack on the job.
When a pool leak diagnosis points to the shell, we are the call.
Ready to Stop a Pool Leak at the Right Source?
A pool leak that is in the pool shell does not have to drain your pool or your wallet. Run the bucket test. Run the dye test. Map the leak. Then call the right pro for the right repair.
If the source of the leak is a crack in your concrete pool shell, call Torque Lock Structural Systems at (818) 436-2953. Email us at info@torquelock.com. Our hours are Monday through Friday, 7:00 AM to 3:30 PM PST.
Find the leak. Fix the leak. Save the pool. Save the water.